


The Takedown System
Before the ovate barrels can have profiles cut for this project the takedown system needs to be cut on each barrel.
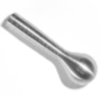
The BSA Martini takedown system consists of a tapered screw that passes through the action from left to right perpendicular to the axis of the bore. The taper of the pin mates with a cut on the underside of the barrel threads and as the pin is screwed into the action the first thing that happens as the screw is engaging this barrel cut is that the barrel is rotated into the top dead center position until the screw surface and the barrel surface are fully mated. As the screw is then fully tightened the barrel is pressed firmly upwards into the upper parts of the action treads ‘locking” the barrel to the action. There is nothing particularly sophisticated about this system but having studied some of the other British takedown systems it is svelte and reliable.
The problems associated with implementing this system on a four-barreled project were evident.
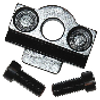
First, how to use a common pin for all of the barrels. Multiple barrel-specific parts present a problem because if lost, the efficacy of the system is diminished. Two breach blocks and two extractors would be needed already and I did not want any more duplication of parts. I wanted to use a lever on the takedown pin that would index straight down when torqued in for each barrel. A lever would afford the luxury of not having to have a screw bit readily available for barrel change outs. Morris thought that EDM gave the best opportunity to control this part of the project.
The takedown screw was secured in the vise of an optical comparator and the taper of the pin was established as 4 degrees.

I had rough turned four takedown blanks out of O-1 tool steel and Morris brought each to near final dimensions on the lathe and threaded each.

Graphite rods 5/16” in diameter were then secured in a Harig fixture and dialed in. This set up was moved to a sine plate set to give the appropriate 4-degree taper. Using a surface grinder, four EDM electrodes were cut that duplicated the profile of the takedown screw.

To reduce the EDM time needed to cut the groove in the bottom of the barrel threads the barrels were placed on two V blocks and loosely secured. This setup was moved to the mill, the action was screwed to the barrel with the slightest snug up. This setup was then dialed in using the side of the action. The sides of the action had previously been precisely surface ground to a thickness of plus or minus .002”. Once dialed in and secured in the fixture a 3/16” end mill was centered in the takedown screw hole, the action was removed and a rough cut of the groove was cut through the threads.

A second mill cut was done while the barrel was secured in this setup. A 3/4”X1 1/2” section of the barrel about 4” forward of the action was milled. This flat on the left side is 90° left of top dead center for the barrel and will be used for the CNC set up.
A reliable method of controlling the depth of the EDM cut needed to be established and this was done by screwing the takedown pin tightly into the action. The action was then set up on the surface grinder and the head of the takedown pin was flat. The original BSA barrel that came with the action was then screwed in, the takedown pin was screwed in and brought up tight and then backed out 1/2 turn. The width of the action from the right side to the top of the screw head on the left was measured and this would become the desired depth for the EDM cut.
The barrel still secured in the v block fixture was then moved to the EDM where the tapered electrode was already installed. The side of the action was dialed in and the mill-cut flat on the barrel (can be seen in this photo) was used for a cross-check verification.

The setup was then secured, rechecked and then the takedown pin hole was positioned under the electrode. The electrode was lowered so that it could be brought into contact with the threaded portion and alternately touching off in the x-axis and y-axis the center position was established for the center of the pin.

The action was unscrewed from the barrel and the EDM process was started.

Checks were made periodically to gauge depth progress by raising the electrode, screwing the action onto the barrel, screwing the takedown pin in and finally measuring the width. The final result looks very good and is quite repeatable to ensure tight tolerances from barrel to barrel. Light hand stoning will be used for the final fit.

The CNC setup will be covered next starting with design of the fixtures.


