Part 2-The Metal Work A .404 Jeffery Stalking Rifle
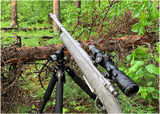
I now had all the parts in hand to build a rifle and I got regular updates from Stuart Satterlee about progress on my action. Slowly it evolved into a complete action. The correct barrel had arrived in his shop from Lothar Walther while the action was being made and it was threaded and chambered as soon as the action was ready. I received the barreled action in December 2012.
First Reactions The early .404 Jeffery rifles were built on standard length actions that required careful modifications to accommodate the large .404 Jeffery cartridge. It appears, however, that all the Continental and British makers moved to the larger action as soon as Mauser started production of the magnum length offering. Having never owned nor handled a large Mauser action it took a while to get comfortable with the size of the Satterlee Arms action. I had just completed a 9.3x62 on a Persian Mauser which is a standard size action and the size difference is not a subtlety.
Fit and Finish The metal work on the action is first class. Flat surfaces are dead flat, round surfaces are smooth parts of circles and the concave cuts are appropriate parts of arcs. No machine tool marks are evident anywhere on the action or action component parts. It appears that the final hand polishing was done with a 400 grit abrasive and very well done. A quick matting with a scour pad or a carding brush and the action would be ready to rust blue just as it was. Stuart had delivered on his representation that the action would not require a lot of hand work to prepare for bluing.
The finish on the barrel was excellent as well. I don't know anything of the final finish process that these Lothar Walther barrels receive on the exterior but it is as good as I've seen.
Action Component Modifications The trigger had a flat tip profile and the interior arc consisted of two bevel cuts. I thought the trigger could have a more pleasing profile and I rounded the tip and smoothed the bevels at their intersection into a rounded surface. The trigger was very hard and abrasive stones were required to do this task. I also checkered the bolt release tab. The bridges were the only other part of the action that would be modified and that will be described later.
Installing The Iron Sights The Recknagel rear sight band was a tight fit on the part of the barrel that had been turned for it. It could be gently tapped into place but could not be slid on. I have a small lathe, barely adequate for what I was contemplating, and limited experience with turning metal work. The rear shoulder of the barrel shank for fitting this band needed just a touch of truing and this was done with trepidation creating a slight undercut so that a modest seating crush from the band would give a minimally visible joint. A 1018 steel cylinder was also turned so that the rear sight band could be affixed on it by using archer's ferrule cement. This then was centered in the lathe and the rear of the band was trued.
I used the low temperature version of the Force 44 solder to attach the band on the barrel. The barreled action was leveled in a bench vise using the flat bottom of the action for reference. The shank of the barrel and the interior of the band were tinned and then the band was tapped into place as heat was applied. I used a hammer against a 1/2" piece of hardwood held against the lug on the bottom of the band to drive it into place. Then the band had to be tap-rotated into the correct alignment on the barrel. This process was tedious and frustrating as I over rotated several times and had to reheat and try again. Keeping the temperature of the metal as close to the melting point of the solder as possible left a very short working time to make adjustments. Additionally, the limited flat surface of the band top for setting a level contributed to the difficulty.
Eventually I got it done but there was one other problem that needed solved. The sight band was 2.2" long. The shank on the barrel for some unknown reason was 2.7" long. Stuart had warned me about this so I knew it would have to be fixed as the extending portion of the shank beyond the extent of the band did not look good. Using the barrel taper rate, I calculated the diameter at three distances along the 1/2" section of the shank that had to be tapered and then using a cutoff tool on the lathe did plunge cuts at these three locations. This established the correct diameter to extend the taper properly to the front of the ring. I then used these plunge cuts as a reference to hand file to full depth along the section.
I was now ready to move on to the front band. The barrel muzzle diameter was .725". The closest band interior undersize diameter available was .710" diameter. This is not an insignificant difference. I would have to turn the muzzle end of the barrel or expand the diameter of the band. My lathe skills are simply not adequate for this so I turned a piece of 1018 steel with four steps. It started at .710" and went to .720". I polished the face of a ball peen hammer to mirror finish so as not to transfer marks to the band and then peened the band up to the .720" diameter. These bands are soft steel and by very precise application of light hammer strikes over the entire band surface the end result was a band with a snug fit on the .720" section that looked very good on the outside.
I wanted the band set back farther than is typical for American banded ramps but not as far back as some of the British gunmakers. I tinned the barrel muzzle and the interior of the band and then using the method described earlier for the rear band, drove the ramp on leaving 3/8" of the muzzle end of the barrel protruding beyond the front of the ramp.
Cutting The Scope Ring Bases The last of the metal work on the barreled action was cutting the bridges to the CZ profile. Between the time that I first talked to Morris Melani, owner of Alaska Arms LLC, and the time that I had the sights on the rifle, a friendship had developed and Morris did this part of the project for me. He is an extraordinary machinist and with my barreled action mounted on a jig that I fashioned from a piece of square stock steel he completed the metalwork on the action. As an aside, the precision of Stuart Satterlee's machining was evident as the action was set up for making the cuts. The tolerances over the entire action were very good, consistently holding under a few thousandths in all dimensions.
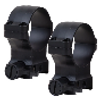
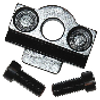
Profiling The Scope Rings The final metal work was applying some profile changes to the Alaska Arms LLC quick detachable scope rings. I started by removing all the finish with toilet bowl cleaner. The rings have a three-facet profile and I smoothed these to a continuous rounded profile. The ends of the levers are square and these were rounded and the lever ends shaped to a tear drop, thinned a bit and then checkered on the top. All parts were then polished with 320 grit paper and brushed to a matte finish preparatory to rust bluing and nitre bluing.
Next-Part 3, Stockmaking The Hard Way


