


Installing quick detachable rings on Ruger firearms
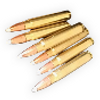
By following a few basic steps you will obtain excellent results combining our scope rings with your firearm. Before we get started let's do some safety steps: Verify that the firearm is unloaded; remove any and all ammunition from the work area; and; remove the bolt from the firearm when possible. And remember, observe safe firearm handling practices at all times. Failure to do so may result in grievous bodily injury or death. Alaska Arms LLC shall not be responsible for injury, death or damage to property from misuse, improper installation or modification of this product.
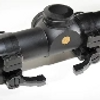
The first step is to obtain the correct size rings based on the optics you plan to use. Keep in mind that the compact scopes tend to be too short for some of the long magnum actions so consider action length when selecting a scope. Leupold now offers fixed three power long tube scopes through its custom shop with a selection of reticles for around $300.00.
Once the optics have been selected, review our scope ring selection matrix (alaskaarmsllc.com) and select the correct ring set. The design of our rings allow them to be assembled in our shop with the levers on the right or left side. It is best to have the levers on the opposite side from loading and ejection ports and the last decision in the selection matrix will be the lever location. Generally you will want to choose levers on the left hand side of the firearm for right hand shooters/firearms and on the right hand side of the firearm for left hand shooters/firearms.
We will exchange a set of rings at no cost if you make an error when ordering, or if you would like to try a lower set. Rings are shipped USPS flat rate priority mail with tracking and arrive 5-7 days after ordering.
This is a good time to review the 'Alaska Arms LLC' YouTube video on installing the rings and download the Ruger ring installation PDF from the alaskaarmsllc.com website. After reviewing the PDF obtain any tools that you lack so that you can do a proper installation.
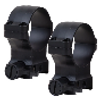
When the rings arrive verify that they are the correct height and finish, then review the installation instructions that are included with the rings. You will find the ring size engraved on the side of the rings. If your firearm requires a ring set whose rings are different heights determine the location of the high and low rings.
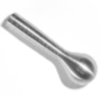
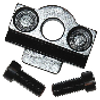
After you have verified that you have the correct ring set remove the top caps from the rings and place the screws and top caps in a secure location. If the screws are lost or misplaced, replacement screws are available from alaskaarmsllc.com. Now loosen the lock screw that is located on the front of the ring assembly. In a later step this screw will be torqued to 25 inch/lbs and it locks the cam screw in place. Back out the cam screw two turns. Position the front ring onto the front integral firearm ring base being careful to align the recoil tab on the bottom of the ring in the corresponding cutout in the receiver. While pressing down on the ring, push it towards the muzzle. Rotate the lever to the locked (3 O'clock or 9 O'clock) position and torque the cam screw to 25 inch/lbs. It is important you resist the temptation to rotate the cam levers to see how they feel until you have torqued the lock screw. Again, the lock screw is found on the front of the ring lower assembly and is tightened with the 3/32 hex key that is included. Now rotate the lever to the 12 O'clock position and press the ring towards the muzzle a second time. This assures that the rings will repeat precise positioning each time the scope is removed and reinstalled.
Repeat the above steps with the second ring lower assembly.
With both lower assemblies properly installed, apply the enclosed friction paper on the inner surfaces of the ring lower half and the top caps. Position the scope on lower ring halves, establish eye relief and plumb the crosshairs. I have found the Wheeler engineering crosshair leveling set to be indispensable for fast and accurate alignment. Install the top caps and torque the screws incrementally in a cross pattern and alternating between the front and rear screws. Be careful to maintain a even gap between the top caps and the lower ring halves.
The scope can now be replaced and removed repeating to within 1/4 MOA as long as the scope is pushed towards the muzzle as the levers are tightened. Prior to reinstalling the scope make certain that the ring/base mating surfaces are free of grit and any foreign material.
Good hunting, Morris Melani


